 By Ethan Brooks
Updated November 2026
A flybird adjustable weight bench lets you move between flat, incline and decline positions with a few quick adjustments, which covers most upper-body and core work in a small space. This guide walks you through what to check before buying, how to set the bench up and adjust it safely, and how to get the most out of it in a home gym. By the end, you should know whether this style of bench fits your training and how to use it without wasting time or risking an injury.
What a Flybird Adjustable Weight Bench Is Designed to Do
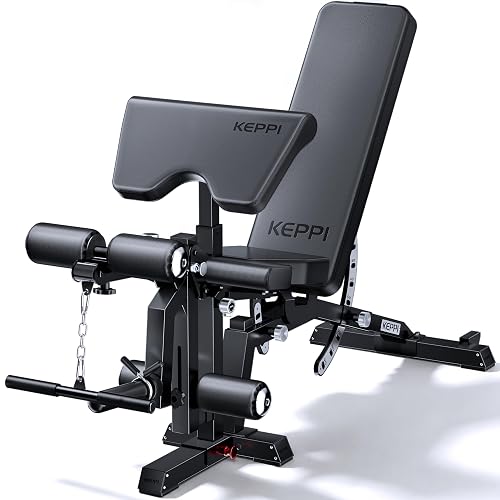
Most adjustable benches on the market share the same core design: a padded seat and backrest that lock into several angles, usually with a folding or pin-based mechanism. Flybird is a brand name that appears on a range of these benches sold through online marketplaces, and the category as a whole is built for home users who want variety without a full power rack. Before you commit to any model, it helps to know what the bench is meant to handle.
Manufacturers typically specify three things for this type of bench: the maximum user weight, the number of backrest and seat positions, and the maximum load the bench can carry while in use. Read those numbers carefully on the product listing or packaging. A bench rated for a certain user weight is not designed to support that weight plus a heavy barbell or dumbbells at an extreme angle.
Typical Adjustment Positions
Many adjustable benches offer somewhere between three and seven backrest positions. Common setups include:
- Flat: Useful for flat dumbbell presses, flat bench barbell presses (if the bench is rated for it), and rows.
- Incline (roughly 30 to 45 degrees): Targets the upper chest and front shoulders.
- Steep incline (roughly 60 to 80 degrees): Shifts more load to the shoulders and is often used for seated presses.
- Decline: Available on some models only. Check whether the bench includes a decline position, since many do not.
Exact angles vary by model, so check the manufacturer’s stated positions rather than assuming they match another bench.
Step-by-Step: Setting Up Your Bench Safely
A new bench needs a few minutes of setup before the first session. Skipping these steps is one of the most common reasons people end up with a wobbly or unsafe setup.
Tools and Supplies You Will Need
- The Allen wrench or hex key included with the bench (keep it in a labeled bag).
- A rubber mallet or block of wood for seating pins and tight joints.
- A tape measure to confirm clearance around the bench.
- A level surface, ideally a rubber gym mat or a piece of plywood over subfloor.
- An adjustable wrench if the model uses bolt-on feet.
Assembly Steps
- Unpack the parts and check them against the parts list. Confirm that all bolts, washers and pins are present.
- Lay the frame flat on a protected surface. Attach the legs or base first, leaving the bolts finger-tight.
- Attach the adjustment bracket or the backrest hinge, following the sequence in the manual.
- Install the seat pad and backrest pad. Check that the padding is secured to the frame and not just resting on it.
- Tighten every bolt fully, working in a crisscross pattern on the base so the frame sits evenly.
- Set the bench on its feet and check for rocking. If it rocks, loosen the joints, reposition the feet, and retighten.
Checking for Stability
Before you load the bench, press firmly on each corner of the seat and then on the backrest at its highest angle. Listen for creaks and watch for movement at the joints. Recheck the bolts after the first few uses, because new frames can settle as the joints seat.
How to Adjust the Bench During a Workout
Changing positions is where many home users run into trouble, mostly because they try to change the angle with weight still on the bench or while they are partially seated. Use this routine every time:
- Set all weights down and move them out of the way.
- Stand beside the bench, not on it, and release the backrest lock or pull the pin.
- Move the backrest slowly to the desired angle, then engage the lock until you hear or feel it seat.
- Test the lock by applying light pressure before you sit. Only load the bench once you are sure the lock is secure.
Matching the Position to the Exercise
| Exercise | Suggested Position | Main Muscles Worked |
|---|---|---|
| Flat dumbbell press | Flat | Chest, front delts, triceps |
| Incline dumbbell press | 30 to 45 degrees | Upper chest, front delts |
| Seated shoulder press | Near upright (roughly 80 to 90 degrees) | Deltoids, triceps |
| One-arm dumbbell row | Flat or slight incline with a knee and hand on the bench | Lats, rhomboids, biceps |
| Decline sit-up | Decline (if available) | Abdominals |
Angles are approximate and depend on the model. Use the positions your bench actually offers.
Choosing the Right Model for Your Space and Training
A bench that works well in a spare bedroom may be a poor fit for a garage with limited floor space. When comparing models, focus on these factors:
- Maximum user weight: Choose a rating that comfortably exceeds your body weight plus a margin.
- Number of positions: More positions help with variety, but the lock mechanism matters more than the count.
- Footprint: Measure the length, width and folded height. Many benches need extra clearance behind the backrest for incline work.
- Padding thickness and cover: Thin padding can become uncomfortable during heavy sets. Vinyl covers are easier to wipe clean than fabric.
- Transport and storage: If you plan to move the bench, check the weight and whether it folds.
- Pairing with weights: Dumbbells and barbells need to fit your setup. If you plan to use adjustable dumbbells, see Rack for Adjustable Dumbbells: How to Choose and Set One Up (2026) for storage ideas. Pairing the bench with a complete set is covered in 6 Best Adjustable Dumbbells and Bench Sets for Home Gyms (2026).
If you are still deciding which kind of dumbbells to pair with your bench, the comparison in Flybird Adjustable Dumbbells 25 Lb: 7 Best Picks Compared (2026) shows how different designs fit different benches. For a wider look at budget options, 5 Best Weight Bench Home Gym Options for Every Budget (2026) compares several bench styles side by side.
Common Mistakes to Avoid
- Adjusting the angle while loaded. Always clear the weight first.
- Skipping the lock test. A partially engaged backrest can drop under load.
- Ignoring loose bolts. Vibration from dumbbell work loosens fasteners over time. Check them monthly.
- Placing the bench on an uneven floor. Use a mat or plywood to level the surface.
- Using the bench beyond its rated capacity. Stay within the manufacturer’s stated limits.
- Training with no spotter for heavy barbell work. A bench designed for dumbbells may not offer safety bars or catch points.
- Forgetting clearance. Leave room to stand, rack weights and move around the bench.
Recommended gear
A few accessories make a flybird adjustable weight bench safer and more practical in a home setting.
- Rubber gym flooring tiles: They protect your floor, reduce bench movement, and help keep the frame level. View on Amazon
- Hex key set: Keeps the bench tightened without hunting for the manufacturer’s tool. View on Amazon
- Dumbbell storage rack: Keeps weights off the floor and away from the bench path. View on Amazon
FAQ
Is a flybird adjustable weight bench safe for heavy lifting?
It depends on the rated capacity and the exercise. Stay within the manufacturer’s stated user and load limits. For very heavy barbell work, a rack with safety bars is generally a safer choice.
How often should I check the bolts?
Check them after the first few uses and then about once a month. Loose hardware is the most common cause of wobble.
Can I use the bench for decline exercises?
Only if the model offers a decline position. Many budget adjustable benches do not, so confirm this in the product specifications before you buy.
Do I need a mat under the bench?
A mat or plywood base is strongly recommended. It protects the floor and helps keep the frame level, which improves stability.
How do I clean the padding?
Wipe vinyl covers with a damp cloth and mild soap, then dry them. Avoid harsh solvents, which can crack the covering over time.
Is an adjustable bench better than a flat bench?
For most home users, yes, because it covers incline and seated work that a flat bench cannot. A flat bench can be more stable for very heavy pressing, though, so the right choice depends on your training goals.
Should I consult a professional before starting a new routine?
If you have a heart condition, a shoulder or back injury, or any other health concern, speak with a doctor or qualified trainer before beginning heavy pressing or a new strength program.
Conclusion
A flybird adjustable weight bench can cover a wide range of home workouts when you choose a model rated for your needs, assemble it carefully, and adjust it with the lock fully engaged. Focus on stability checks, clear floor space and the right angle for each exercise. Treat the rated limits as firm boundaries, and recheck the hardware regularly. With those habits in place, the bench becomes a dependable part of your home gym.
Related reading
- 5 Best Flat Weight Training Bench Options for Home Gyms (2026)
- High Weight Adjustable Dumbbells: 5 Best for Heavy Home Training (2026)
Ready to choose one?
About Ethan Brooks
Ethan Brooks is part of our editorial team and reviews and edits our budget home gym equipment guides, checking product details against manufacturer specifications and owner feedback.